
What this Tirunelveli halwa recipe is (and is not)
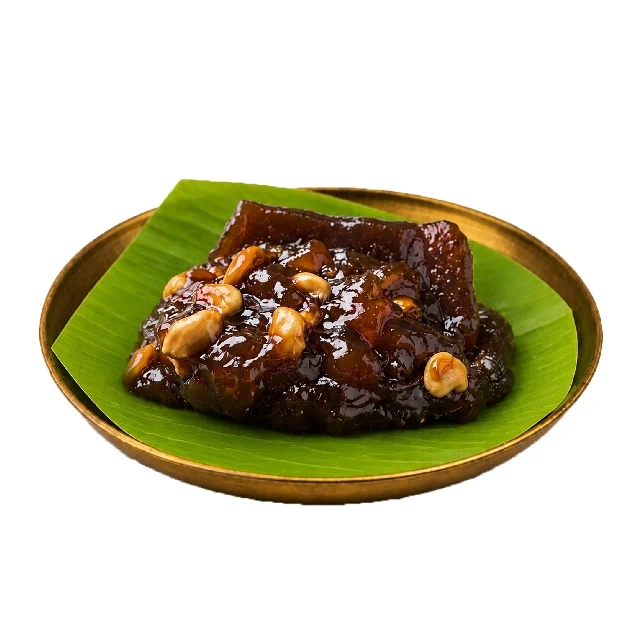
Authentic Tirunelveli wheat halwa is wheat milk cooked down with sugar and a large amount of pure ghee until it turns glossy and almost translucent. It is not rava (sooji) halwa, not carrot halwa, and not a cornflour “Bombay halwa.” This recipe is a home-scale teaching method so you understand why a Nellai kadai takes hours. Crescent’s commercial batches use the same idea at a larger vessel - wheat extract, staged ghee, no preservatives - which is why a sealed pouch or gift box exists if you want the result without a three-hour arm workout.
For the factory-and-heritage process without quantities, read how authentic Tirunelveli wheat halwa is made.
Yield, time, and equipment
This batch makes about 500–600 g of finished halwa (enough for a small family or a tasting gift). Soaking is overnight. Active cooking is usually 90–150 minutes of near-constant stirring. Use a heavy wide kadai or thick-bottomed pan so the wheat starch does not scorch in the centre. A wooden or flat steel spatula helps you scrape the base.
Work on a stable flame. Ghee and sugar get extremely hot. Keep children away from the pan. If the mass starts to catch, lower the heat immediately and stir; bitterness cannot be stirred out later.
Ingredients
- 200 g whole wheat (godhumai), picked clean
- Water for soaking, grinding, and extracting (about 1–1.2 litres in total, used in stages)
- 400 g sugar
- 250–300 g pure ghee, plus 1 tablespoon extra to fry the nuts
- 50 g cashews, halved
- Optional: 2–3 green cardamom pods, crushed (classic Nellai sugar-wheat halwa is often finished without a heavy spice perfume; skip if you want the Crescent Tirunelveli profile closer to wheat and ghee alone)
Do not substitute vanaspathi, dalda, or refined oil for the ghee. That is a different sweet. Do not add artificial colour; the slow cook and ghee should give a natural amber sheen.
Step 1 - Soak and extract wheat milk
- Wash the wheat. Soak it in plenty of water for 8–12 hours or overnight.
- Drain. Grind with enough fresh water to make a smooth paste.
- Pour the paste through a clean muslin or fine strainer into a bowl, squeezing to extract a milky liquid. Return the residue to the grinder with a little more water and extract again. Repeat until the residue feels dry and fibrous.
- You should have a pale wheat milk. Let it rest 20–30 minutes if a lot of foam sits on top; skim the foam. This extract - not dumped dry flour - is the body of Tirunelveli-style wheat halwa.
Step 2 - Combine with sugar and start the cook
- Pour the wheat milk into the kadai. Add the sugar. Stir over medium-low heat until the sugar dissolves and the mixture looks even.
- Keep stirring. The mass will look thin for a long time, then thicken suddenly. That is starch setting; do not walk away.
- When it starts to coat the spatula and pull slightly from the sides, begin adding ghee.
Step 3 - Staged ghee (the part people skip)
Add ghee in four or five ladlefuls, not all at once. Stir each addition until it is absorbed and the mixture looks emulsified rather than oily. This is what creates the signature gloss. If you dump all the ghee early, it can float as a slick and the wheat can still taste raw underneath.
Meanwhile, fry the cashews in a spoon of ghee until just golden. Set them aside.
Step 4 - Doneness, nuts, and rest
- The halwa is ready when it leaves the sides cleanly, looks shiny, and a small cooled blob holds shape instead of running like syrup. It should not taste of raw wheat paste.
- Fold in the fried cashews (and cardamom if using). Stir one more minute.
- Turn off the heat. The residual pan heat continues to cook for a few minutes. Spread into a greased tray if you want slices, or leave it spoonable in a bowl.
Cool completely before packing. Home halwa without preservatives is food: refrigerate in a clean box and finish within a few days, or keep it cool and dry for a short window. Do not treat it like a sealed Crescent tin that was cooked and packed for transit.
What usually goes wrong
- Lumps: extract was not strained, or heat was too high at the start.
- Oily split: ghee added too fast, or the wheat was not cooked enough before fat went in.
- Pale, pasty taste: flour dumped into syrup instead of wheat milk, or the cook was stopped too early.
- Bitter edges: caught on the kadai base. Stir the whole floor of the pan, not only the centre.
That list is why many families buy instead of cooking. If you want Tirunelveli wheat halwa that already finished the kadai, order Crescent’s classic variant from the Tirunelveli wheat halwa pouch or a gift box. The home recipe is for understanding. The pack is for gifting and pan-India delivery.
How this compares with Karupatti
Swap sugar for melted, strained Karupatti (palm jaggery) and finish with cardamom and dry ginger, and you have a different flavour family. Use our separate Karupatti halwa recipe rather than guessing ratios in the same pan. For types of Indian halwa and why these two styles are famous, see types of halwa.